J and I had looked for land for a few years before we found just the right one for us. We needed acreage, since we have horses, and I was wanting to get a few longhorns. We found 22 acres that backs up to a national forest and has a spectacular view of the ozark mountains and valleys. We bought it and held on to it for 3 years while we designed our home. J and I had been planning and dreaming about our "dream home" since we were married. We knew what our priorities were, when it came to our dream home. J wasn't budging on having a large shop/barn, for him to tinker in, and a place for a pool table in the basement. I, in turn, had full reign on the kitchen planning, craft room and the master dressing room. We both knew an excersise room was a must, along with a pool. We spent hours pouring over house plan books, trying to find one similar to what we were wanting, with no luck. So, we decided to draw our own. We spent the better part of a year, drawing, tweaking, adding, taking away, and tweaking again, before we came up with what we thought was our final plan. We then sent it off to the architect to have drawn up. When the plans came back, we noticed things we wanted to change. After a few times of this happening, we walked out of the architects office, our house plans perfected. I was sure that we would change nothing from here on out. I was wrong. It's amazing how you can spend countless hours planning, studying, researching and still overlook things. Little things that you would never think about. In our opinion, an architect is a wonderful asset to the home building process, but don't rely on them to notice or point out things that could be "mess ups." We went over our plans with a fine tooth comb several, several times, and still had to change things here and there along the way.
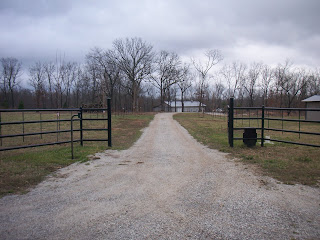 |
| the entrance to our property. the fence will be rocked, i designed the gate, {which you can't see, since it's open}. The shop/barn is in the background. The barn on the right is one that was from the early 1900's, and came with the land. |
We wanted to go as "green" as we could. We splurged on some things, and on others, drew the line. Overall, it's turned into quite a "green" house. We couldn't be more thrilled.
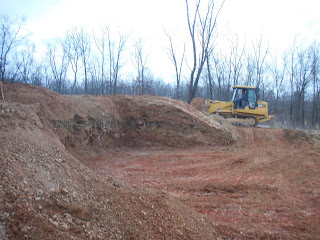 |
| the first day. digging earth for the basement. |
|
|
|
I thought I should probably include the plans to the house, so here they are.
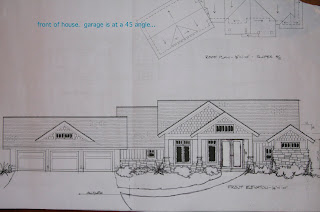 |
| the front view. you can't tell, but the garage is at a 35-degree angle. |
|
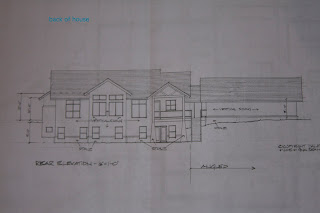 |
| back of the house. |
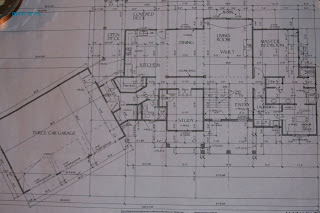 |
| the main floor. |
 |
| the basement. changes had to be made here. more on that later. :) |
If you've made it this far, thanks for reading! We look forward to blogging our building/designing process and decor choices with you!